Wiring ordeal
16/03/2026
"Wiring ordeal" may sound dramatic but it was actually a nightmare. Perhaps the most demanding task of the project. And Grok could hardly help with its core :-/
The background of the project was settled. A POC and a stress test were successful. Yet, there remained the wiring to be done: 36 MID pulse counters were, somehow, to be linked to the four tinys' pins. Then came a time when it could not be postponed any more and no Optimus was available to actually do it…
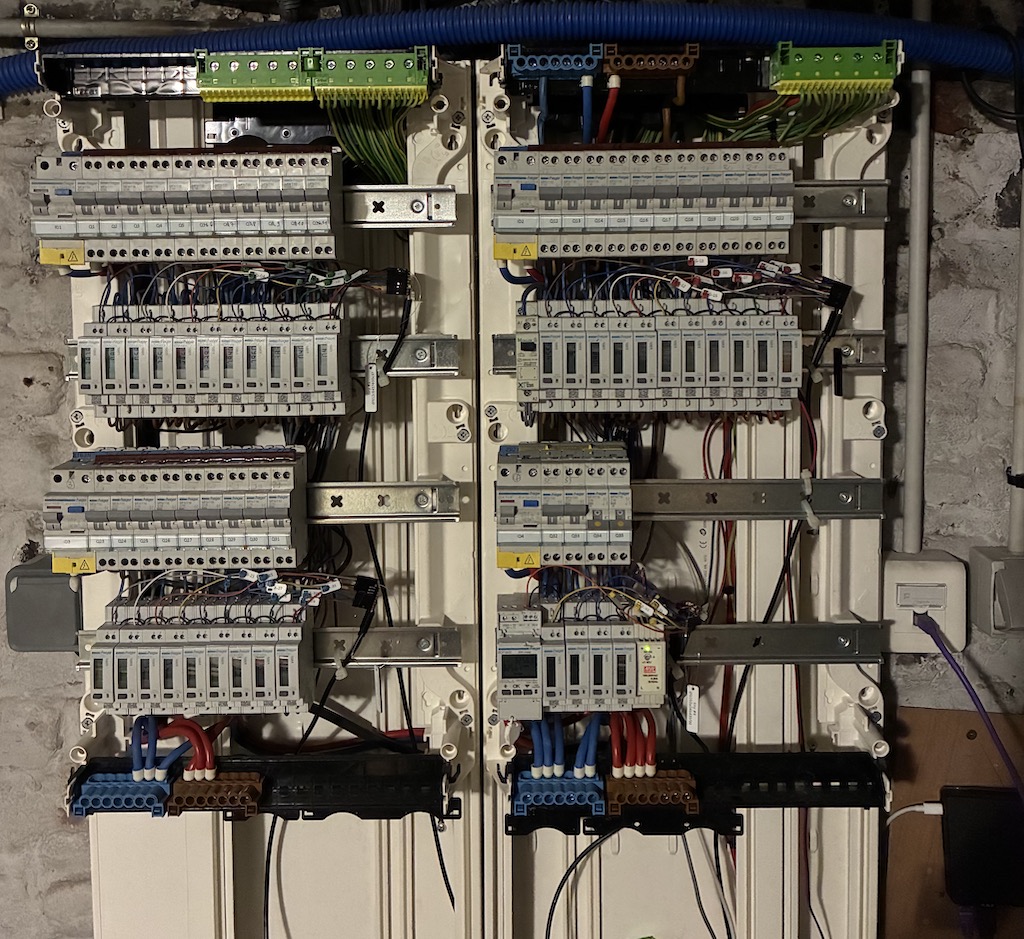
The picture above gives an overview of the result. To be honest, the high-voltage wiring was handed to a professional electrician who did a remarkably tidy job at it. Now we are speaking about the low-voltage wiring. A closer picture details it:
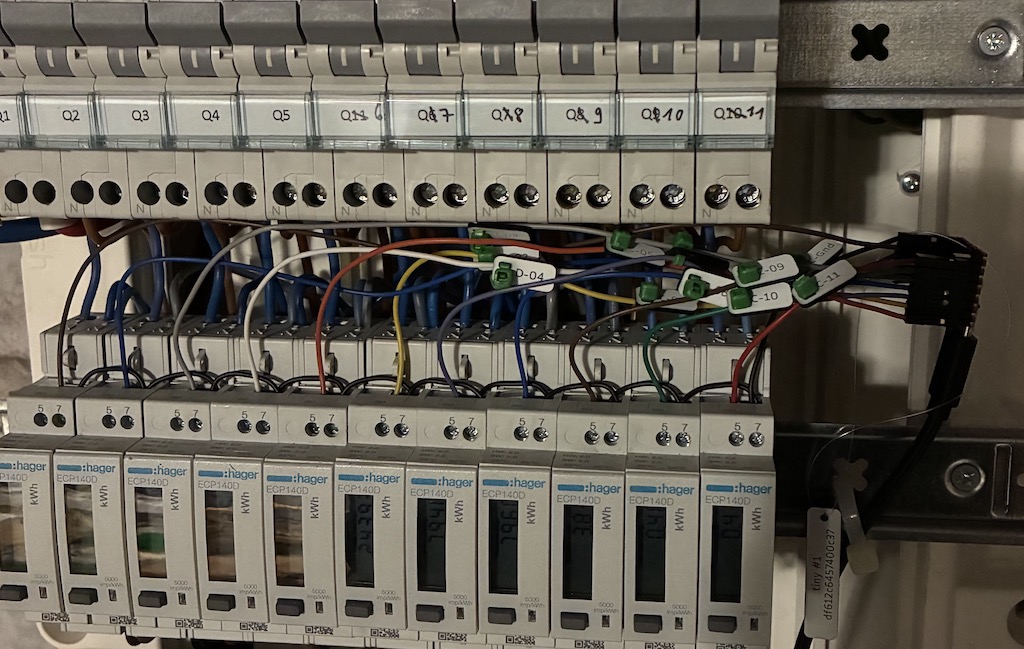
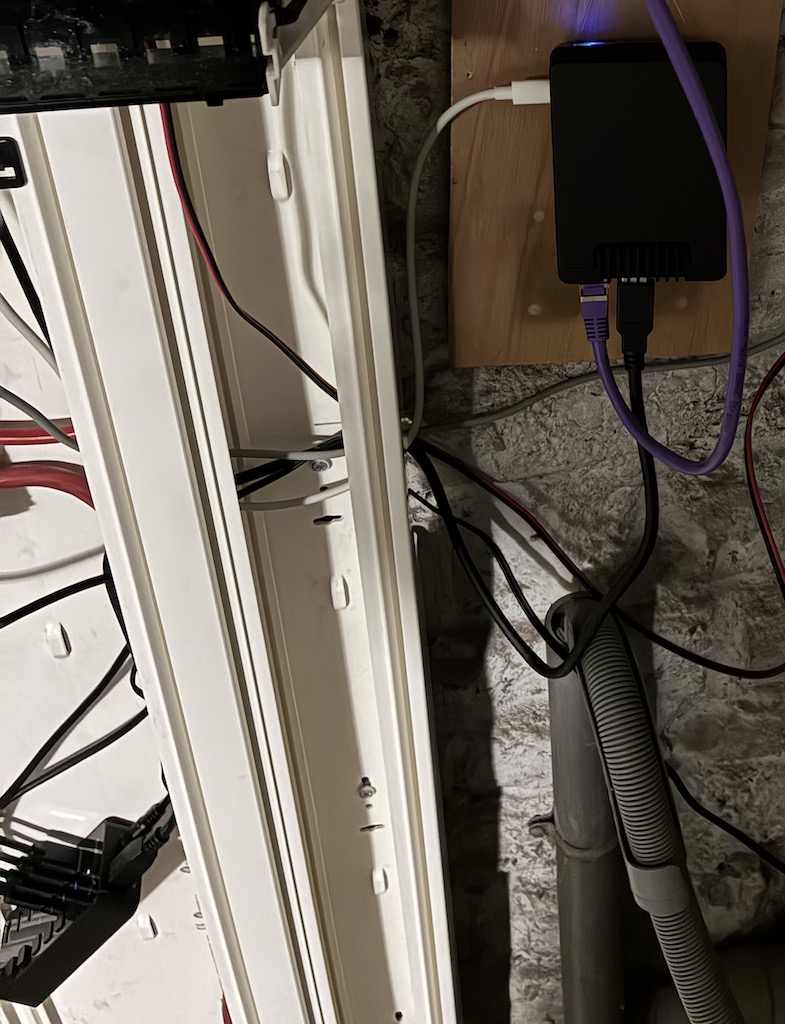
All tinys are then linked to the Raspberry Pi (top right of the picture below) through a USB hub (bottom left).
All that looks nice and cute--and it is so--but it didn't start out this way at all.
As mentioned in the Laser cut wire labels post, the first intention was to use a cat. 6 Ethernet cable and using purchased Dupont wires to connect to the Tiny 2040 headered pins. That involved, among other things, more than one tedious step: cutting, stripping, soldering and heating heat-shrinkable tubes. All that 36 times!
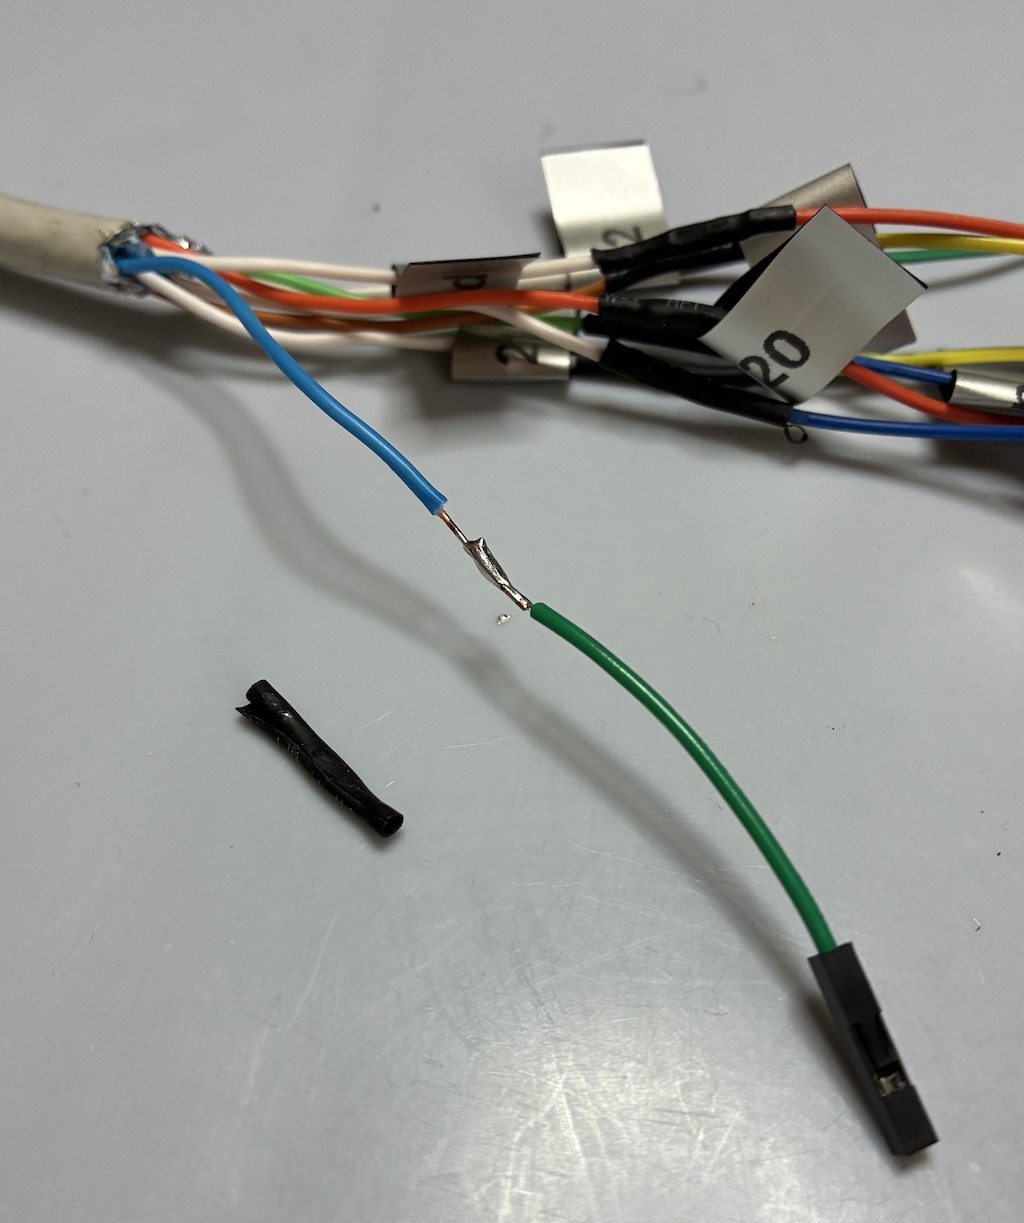
numerunique had to learn another skill: crimping custom made Dupont wires. The good part of it is that there was plenty of crimping to acquire the skill--which was achieved for the last ones.
Of course there were wiring bugs. Hey, why not? Bugs are not for software only.
But not so many: one ground strip connection failed, ghosting half a row of meters. And one SO connection failed also, masking the power consumption of the Pi's alim :-/
Eventually, using the tinys as wire hubs for the MID pulse counters was a smart move after all.